


The transition from idea to tangible part is addictive, but the beginning can seem overwhelming. Terminology, settings, materials—where do you start? With a 3D printer for beginners, you don't need to learn everything at once; you primarily need a short, repeatable approach that gives you results within days. In this guide, AC PRODUCTS outlines a practical route: from the first layer to a reliable workflow, so you can learn without frustration and get quality prints on the table faster.
Think in chains, not individual settings
Every print is the sum of four links: model → profile → first layer → execution. Those who embrace this chain-thinking find that a 3D printer for beginners becomes predictable. The model determines how the printer lays down lines; the profile translates design choices into speed, temperature, and cooling; the first layer anchors the rest; the execution ensures dimensional accuracy and surface finish. If something goes wrong, you look for the cause starting from the first link. Never "tweak" twenty things at once; you change one variable and observe the outcome.
The first layer is your foundation
Ninety percent of failed prints start with a poor beginning. That is why a 3D printer for beginners focuses first on bed leveling, Z-offset, and a clean, degreased build plate. Always perform a short test: a calibration pattern or "squish-lines" across the bed. Edges should be closed, not curled; the filament line should not be constricted, nor round and loose. If this is correct, print failures will drop drastically and your confidence will increase with every run.
Materials: Start soberly, build up
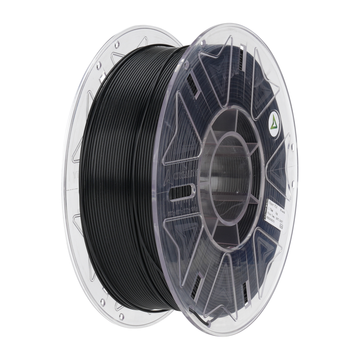
Start with one material and get to know it. PLA is forgiving, maintains dimensions, and requires little temperature discipline. For functional parts, PETG is the logical second step: tougher, more moisture-resistant, but more prone to "stringing." A 3D printer for beginners benefits from clear material profiles: nozzle and bed temperature, cooling percentage, retraction, and speed. Only once you have consistent results with PLA and PETG should you explore ASA (UV-resistant), PC blends (heat), or nylon composites (stiffness).
From STL to part: Work with basic profiles
Do not be tempted by a hundred presets. A 3D printer for beginners becomes reliable with two profiles per material: basic (functional, faster) and visual (finer layers, lower speed, extra exterior walls). Copy, rename, and change a maximum of two parameters per iteration: for example, layer speed and cooling for a thin wall, or temperature and retraction for stringing. This way, you can revert if something worsens and your learning curve remains linear.
Orientation and support: Think before you slice
Print orientation determines strength, visual quality, and the amount of support. For visual parts, orient the "good side" horizontally so that layers blend into the light. Orient mechanical parts so that the force runs as much as possible in the XY-direction (the Z-direction is the weakest). Support is a tool, not a safety net: choose an angle (e.g., from 50–60°), limit overhangs, and remove carefully afterward. A 3D printer for beginners gains a lot from smart positioning before slicing.
Mistakes everyone makes (and how to avoid them)
The first mistake is trying to print too fast. Higher speed only comes once the dimensional accuracy is proven to be stable. The second is "fiddling" with profiles without logging; document the date, material, nozzle, and changes. The third is postponing maintenance: if the gears are slipping or the build plate is greasy, every extra attempt will worsen the result. Remember: a 3D printer for beginners performs surprisingly maturely if you maintain discipline in small habits.
One compact checklist that saves every print
- Prepare: check model orientation, degrease bed, ensure filament is dry
- Choose profile: basic or visual; change max. 2 parameters
- Verify: calibration pattern + measure one dimension
- Start: observe first layer; adjust Z-offset by 0.02–0.05 mm if necessary
- Finish: take a photo of the first layer and visual side, log three dimensions, note profile version
If you consistently follow these steps, your 3D printer for beginners will soon behave like a mature workhorse.
Common doubts, clarified
"Do I need an enclosure?" For PLA and PETG, an open setup is fine; ASA/ABS and PC blends benefit from a closed, warm environment. Start without one, learn the material, and upgrade with purpose. "Which nozzle is best?" A standard 0.4 mm is versatile. For functional parts and speed, 0.6 mm is a game-changer; for miniatures or text, you can go to 0.25–0.3 mm, with the caveat that tolerances become stricter. "How dry is 'dry'?" Filament that cracks when bent or "sputters" at the nozzle contains moisture. A simple dry box or oven at a low temperature (according to the manufacturer!) immediately provides tighter lines and less stringing—instantly noticeable on a 3D printer for beginners.
AC PRODUCTS: Starting without detours
We help you choose which machine suits your goal (build volume, materials, consumables), provide a set of proven basic and visual profiles for PLA and PETG, and can set up a light QC routine (calibration disc, stringing tower, measurement card) if desired. This way, you will cross the threshold from "experiment" to "predictable result" faster with your 3D printer for beginners. If you want to use ASA, PC blend, or a nylon composite later, we test that in a controlled manner on small coupons before you commit production time.
Conclusion: Start small, win big
You don't have to be an expert to print reliable parts. Those who think in chains, take the first layer seriously, work with two profiles, and verify each run briefly will see calmness and repeatability emerge after just a week. That is exactly what a 3D printer for beginners is made for: learning fast, delivering fast, and raising the bar step by step. With a sober workflow and a few good habits, you aren't just building prints, but above all, building confidence. AC PRODUCTS is ready to make that learning curve shorter, and your results faster, from the first calibration to the first series that comes off the plate perfectly the first time.
View our extensive range and get inspired by AC PRODUCTS.


Leave a comment