


You want parts that look clean, fit reliably, and come off the plate without unnecessary hassle. At the same time, you don't want to spend weeks fine-tuning settings. The Creality Ender 3 V3 KE offers exactly that middle ground: enough power and control to create functional prints, with a workflow you'll quickly master. In this article, you will read how to get the most out of this machine with smart choices, whether you are printing test pieces, small batch parts, or presentation models.
What we mean by balance
In 3D printing, convenience and performance sometimes conflict. Easy printing often means safe, conservative settings; maximum performance, on the other hand, requires tighter process control. With the Creality Ender 3 V3 KE, that balance is easy to find. The platform is forgiving enough for initial prints, while giving you the fine-tuning capabilities to achieve visibly cleaner results after a few iterations. Think of predictable first layers, neat wall transitions, and repeatable custom work without spending all afternoon stuck in the slicer.
Ease of use in practice
Ease of use starts with the first layer. Stable bed preparation, clear operation, and reliable leveling keep setup time short. You see it in the small things: a well-organized interface, logical steps for nozzle and bed temperatures, and profiles that don't force you to open every parameter. As a result, the Creality Ender 3 V3 KE feels familiar very quickly. You start with a single temperature tower and a flow calibration, and you usually have the recipe for PLA or PETG down within one or two prints. TPU requires slower movement, but even there, the machine helps you with consistent extrusion and predictable tension management along the filament path.
Performance without unnecessary friction
Performance lies not only in absolute speed, but primarily in quality at realistic speeds. The Creality Ender 3 V3 KE allows you to achieve convincing detail at standard layer heights, while edges and curves remain clean as you pick up the pace. PLA delivers sharp corners and neat mating surfaces; PETG remains tough and dimensionally stable if you dose your cooling; ASA can be used outdoors if you keep the environment free from drafts. The result is not that you print "hard," but that you produce quickly enough and, most importantly, predictably. That saves on rejects, post-processing, and time spent at the machine.
Who is this a logical choice for?
Product designers want to iterate reliably. Makers want clean parts without a steep learning curve. Educational institutions want a machine that doesn't require supervision every hour. The Creality Ender 3 V3 KE fits all those contexts. You get enough build volume for most housings, brackets, and fixtures, while the footprint remains modest. Combine that with quiet operation, and you have a printer that fits just as well in a workshop as it does in a closed-off corner of an office.
Material selection: What works when
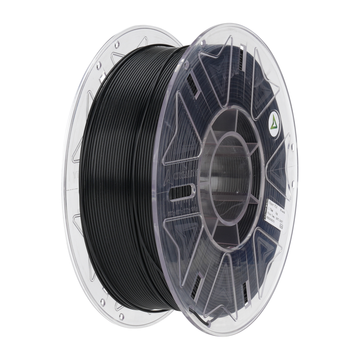
Start with PLA if you prioritize appearance and sharpness. Switch to PETG if a part needs to withstand impact, sees moisture, or needs to bend slightly without breaking. If you want to use it outdoors or in higher ambient temperatures, choose ASA and keep the environment warm and constant. TPU can absorb a surprising amount of impact; lower the print speed and limit retraction to let the filament flow smoothly through the drive. The Creality Ender 3 V3 KE switches between these profiles without issue as long as you use a fixed recipe per material: nozzle range, bed temperature, cooling, and speed as a set. That is the shortest route to first-time-right results.
Dimensional accuracy and tolerances
Tight fits come from a combination of mechanical stability and thoughtful orientation. Print snap-fit clips as much as possible in the longitudinal direction of the fibers, choose vertical orientation for mating steps, and test one critical dimension in a small test part. You can prevent surprises with a simple routine: first, calibrate flow with a single-walled cube, then fine-tune the first layer, and finally adjust cooling and speed as a pair. The Creality Ender 3 V3 KE rewards this with walls without over-squish, holes that remain round, and surfaces that don't bulge.
Maintenance that really makes a difference
Maintenance is not a full-time job if you keep it small and regular. Clean the bed, keep the rails dust-free, check belt tension monthly, and replace the nozzle when you print with filled materials frequently. A quick preventive check before starting a long batch prevents interruptions. Those who work with technical materials should keep rolls dry and note the best recipe for each spool. This way, you build your own library that fits your Creality Ender 3 V3 KE perfectly.
One practical list: Quick wins in your workflow
- Work with one base profile per material. Vary from there in small steps of 5 degrees or 5 percent cooling.
- Calibrate per nozzle size. A 0.6 mm nozzle saves time without a visible drop in quality for functional parts.
- Minimize support by orientation. Less support saves on post-processing and improves the surface finish.
- Measure early, not just at the final print. Test critical dimensions on a small panel or test block.
Integration into your CAD-to-print chain
A strong chain prevents quality from being a matter of coincidence. Work with fixed file names, version control, and mini-checklists for slicing. Ensure critical parameters are saved visibly with the part. That way, you can repeat exactly what worked weeks later. Combine that with visual references of first layers, and you can see at a glance whether a deviation is caused by material, environment, or settings. The Creality Ender 3 V3 KE is then no longer just a standalone machine, but a reliable link in a mature workflow.
AC PRODUCTS as a partner
You don't have to figure everything out on your own. AC PRODUCTS helps you with material selection, nozzle strategies, profiles, and maintenance planning. We look at your applications and provide a recipe that suits your Creality Ender 3 V3 KE and your team. If you want to scale up, we can set up consistent profiles for multiple identical systems together. This allows you to maintain control over quality and pace without increasing the complexity of your organization.
Conclusion: Just right for those who want to scale smartly
Those who want speed without chaos choose a platform that delivers predictably. The Creality Ender 3 V3 KE combines a short learning curve with repeatable results, from visual models to functional parts. Set up your material profiles, calibrate small but consistently, and turn maintenance into a short routine. You will notice after a few projects that the machine no longer requires attention, but instead adds value. And that is exactly the balance you were looking for: ease of use and performance in one package, with the Creality Ender 3 V3 KE as the silent engine of your 3D printing process.


Leave a comment