


You know the feeling: the printer is ready, the design is sliced to perfection, and yet the first layer ends up as spaghetti. In many cases, the cause is not the printer, but the way you handle your material. Anyone printing with Creality filament has a solid and budget-conscious brand at their disposal, but only with the right preparation can you utilize all the qualities hidden within such a spool. In this guide of approximately 1,450 words, you will discover how temperature, storage, slicer settings, and post-processing together make the difference for a clean print. AC PRODUCTS shares practical data from its own test lab so you don't have to guess, but can rely on proven parameters.
Material selection: PLA as a gateway, PETG for functional parts
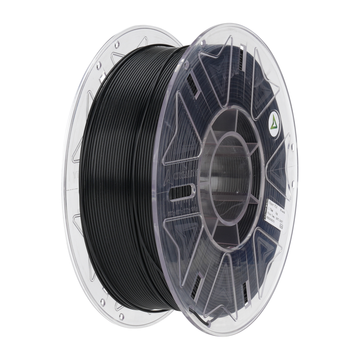
Before diving into the details, it is useful to briefly explain the most popular variants of Creality filament. The PLA line is stable, low-odor, and adheres at a bed temperature of just 50 °C: ideal for prototyping and decorative prints. PETG adds chemical resistance and slightly flexible strength, but requires a higher nozzle and bed temperature. Creality’s ASA and ABS score highest for heat and UV resistance but require an enclosed housing and active extraction. If you choose the wrong material for the application—for example, PLA for a part on a car dashboard—no amount of slicer tweaking can save the print. Therefore, always start with a clear list of requirements: temperature load, tensile strength, visual finish, and post-processing.
Spool inspection upon receipt
Every new delivery of Creality filament deserves a quick check before you put the spool in the dry box. Verify that the seal is intact and that there is a bag of silica gel in the packaging; after all, moisture is the arch-enemy of FDM material. A moisture meter does not have to be expensive—AC PRODUCTS sells a handheld meter for less than € 15 that shows in seconds whether the water weight percentage remains below 0.5%. Does the filament develop a matte, bumpy extrusion, or do you hear small pops while printing? Then the material is undoubtedly moist. Drying for two to three hours at 50 °C in a convection oven or filament dryer almost always restores the quality.
Calibrate the first layer
A fixed print plate offset is convenient, but not every type of Creality filament flows with the same intensity. For example, PLA behaves differently than PETG because it solidifies at a lower temperature. Therefore, take the time to adjust the live Z-offset per material. A well-known method is the “single line test”: print one perimeter around the entire plate and check if the line is pressed down nicely and evenly. Do you see a jagged edge? Then the nozzle is too far away. If the filament is smeared transparently, you are too close to the plate. By saving this setting as a starting point in your slicer profile, you prevent most warping and adhesion problems.
Nozzle and bed temperature: Higher is not always better
Many users increase the nozzle temperature in the hope of getting a smoother finish. With Creality filament, that works to a certain extent, but above a certain point, the mechanical properties deteriorate. AC PRODUCTS tested PLA at 190, 200, and 215 °C and saw a 17% increase in layer adhesion at 215 °C, but a 24% decrease in stiffness. The optimum was around 205 °C. A similar trade-off applies to PETG and ABS: too high results in better layer bonding, but increases stringing and shrinkage stresses. Our advice: follow the manufacturer's median value (for PLA 200–205 °C, PETG 235–240 °C) and only adjust when a specific print requires it, such as for thin walls or bridges.
Some summarized slicer parameters for quick gains
- Retraction length: 0.8 mm for direct-drive, 1.5 mm for Bowden, speed 25 mm/s
- Print speed: 50 mm/s for PLA, 40 mm/s for PETG, 30 mm/s for ASA/ABS
- Cooling: PLA 100%, PETG 30%, ASA/ABS 0% + chamber > 45 °C
- Flow correction: 98% to 102%; measure wall thickness and correct per spool
- Layer height: choose 0.2 mm for standard, 0.12 mm for detail without unnecessary print time
- Infill pattern: gyroid or cubic for resilience; lines for fast prototypes
With this base model, you will achieve a usable print in 80% of cases immediately; only adjust outside this range if the design or printer conditions require it.
Maintenance: Clean filament, healthy feeder
Nothing is as frustrating as a perfectly adjusted gcode file that fails due to a clogged nozzle. Creality filament leaves relatively little residue behind, but switching between dark and light colors can loosen pigment remains. Use a “cold pull” with cleaning filament after every 1.5 kg of printing. Lower the nozzle to 90 °C for PLA or 110 °C for PETG, pull the wire out slowly, and inspect for black spots. Feeder wheels deserve just as much attention: an accumulated dust rim causes slips and inconsistent flow. Blow compressed air through the extruder monthly and check the spring tension.
Adhesion tricks for difficult geometries
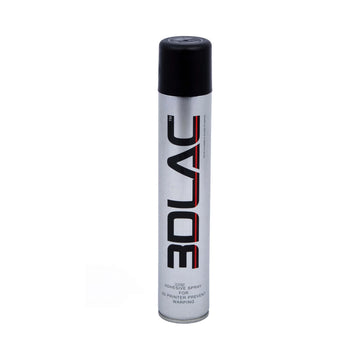
Even on a flat, well-calibrated plate, PETG can sometimes adhere too strongly and PLA too weakly. A thin layer of PVA glue stick or standard wood glue in water (1:10) gives both materials the right balance between grip and release. For ASA/ABS, a PEI surface in a closed chamber is ideal; those who cannot eliminate warping despite everything can try a 5 mm skirt brim and a 10 °C higher chamber temperature. Do not forget that a first layer that is too cold causes most problems—better to have a bed at 65 °C with the fan off than a cold plate with 100% fan power.
Post-processing: Annealing, gluing, and painting
Creality PLA filament can be tempered in a kitchen oven at 80–90 °C for higher heat resistance. Place the object on baking paper, heat for 30 minutes, and cool slowly. Expect 2–3% shrinkage; therefore, model holes slightly larger. PETG benefits less from annealing but glues excellently with superglue or epoxy. You can post-process ASA/ABS with acetone vapor for a glossy, waterproof surface. Painting? Sand lightly with 400 grit, degrease, use a plastic primer, and finish with acrylic paint.
Cost and inventory management
A spool of Creality filament offers 1 kg of effective material; if you print with 15% infill and a 0.2 mm layer, you can get about 50 average phone holders from one spool. With a material cost of roughly € 25, that comes to € 0.50 per piece. By keeping leftovers of 50–100 g separate and using them for test prints, you reduce waste to below 5%. AC PRODUCTS advises not to have more than two months of stock open—after that, the moisture and aging risk increases, even in dry boxes.
Service from AC PRODUCTS
You do not order Creality filament to sit on a shelf, but for reliable production. That is why you receive ready-to-use Cura, Prusa, and Orca profiles with every order, optimized per material. Our engineers are available every Tuesday and Thursday to join a live session to look at your slicer settings and help you get rid of stringing or layer splits within minutes. Prefer to experiment first? Request a sample kit of three ten-meter lengths: this way you can align the nozzle and bed before buying full spools. And because sustainability is becoming increasingly important, you can return empty spools: we recycle the plastic and give you a discount on a new order. This keeps your learning curve short, your environmental impact low, and your cost price predictable.
Conclusion
Creality filament offers an excellent balance between price and performance, provided you follow a few rules: store it dry, calibrate the first layer carefully, use moderate nozzle and bed temperatures, and perform periodic maintenance. With the slicer parameters from the list, a critical choice of material, and the practical support package from AC PRODUCTS, you will get the maximum out of every spool—from PLA prototypes to functional PETG parts and UV-resistant ASA prints. This keeps your printer fleet productive, your cost price sharp, and your end result professional. Good luck with your next print session!


Leave a comment