


You do not print by chance. You want parts that look the same today as they did yesterday, without having to fine-tune every single time. With Creality filament, you get a solid material foundation, but constant quality only truly emerges when you standardize a few habits: storage, drying, first layer, and especially clear profiles per part type. In this guide, AC PRODUCTS sets out the complete, no-nonsense process for you, so you lose less time on adjustments and have more time left for real production.
Consistency begins before the printer
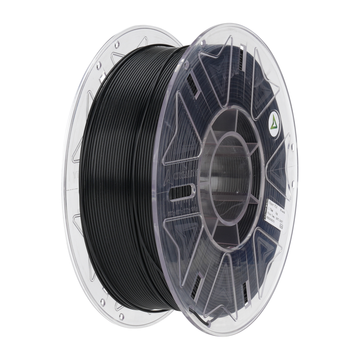
The secret to predictable prints is boredom: the same conditions, time and again. That begins the moment you open the bag. Label the spool with date and batch; perform a quick “break-in print” (a small calibration object) to confirm that behavior matches your reference. If you work with Creality filament, you benefit from neat diameter control; combine that with a fixed drying routine and you eliminate 80% of variation before you even start slicing.
Choose the right material for the function
Not every part has the same task. Concept models demand smooth surfaces and easy post-processing; functional parts require toughness and heat resistance. Creality PLA filament is often the fastest route to neat visual models, while PETG is more forgiving for clips and outdoor use. For higher temperatures and UV resistance, ASA makes more sense than ABS in an open printer, and TPU is the logical choice where you need grip or cushioning. By choosing one proven material per part type, you avoid endless tweaking of parameters.
Storage and drying: Zero variation, zero hassle
Moisture is the silent variable that shifts your surface from glass to grey. Store spools airtight with desiccant and note the relative humidity. A simple dry box or filament dryer with a fixed time/temperature per material works wonders. Still dry newly opened spools briefly before you start a longer run; Creality filament also benefits from a stable moisture balance. If you notice small “pops,” hairs, or matte lines during printing, it is better to pause and dry again than to compensate with temperature or flow—the latter hides the problem, it does not solve it.
The first layer is the first check
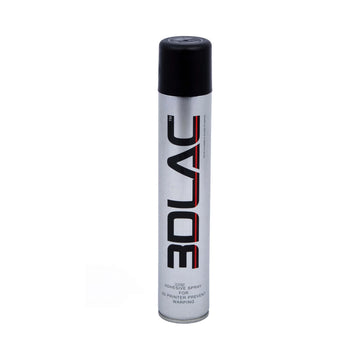
A predictable workflow starts with a predictable Z-offset. Let automatic bed leveling do its job, but always establish a fixed ritual: clean nozzle, degreased plate, check reference brim. For PLA on PEI, a slightly lower bed temperature than you might expect often works; PETG adheres firmly and sometimes requires less bed temperature or an intermediate layer (glue stick) to prevent damage during removal. The goal is not “stuck is stuck,” but “firm enough and removable without drama.” Use the preview line of your brim as a quality indicator: gloss, width, and texture edge reveal in the first 30 seconds whether Creality filament is behaving as it did yesterday.
Calibrating without getting lost
Calibration is not a hobby, it is maintenance. Work with short, meaningful tests: a temperature tower that you actually inspect for bridging and overhang; a small flow cube on which you measure wall thickness; a retract ladder that makes stringing visible without taking up an entire afternoon. Record the winners per material and per nozzle diameter. Never change two things at once. If you notice that Creality filament needs just a touch more cooling on bridges with a 0.6 mm nozzle, add that to the “0.6 mm profile” and leave it alone for 0.4 mm. This keeps your system stable, even when you switch products or team members.
A practical checklist for constant results
- Batch management. Label every spool with date/batch, note which batch is used in your slicer profile.
- Dryness. Check humidity; dry as standard for longer runs and if in doubt.
- Cleaning. Degrease build plate, clean nozzle, check Z-offset with a fixed brim.
- Profiles. Use your three core profiles; change only temperature or speed within narrow margins.
- Nozzle choice. Match parts to a nozzle diameter (0.4 mm for detail, 0.6 mm+ for functional tempo).
- Acceptance. Keep a “gold piece” for every part as a visual/measurable reference for the next batch.
Reading problems like a technician
Constant results require quick diagnosis. Shiny edges and under-extrusion? Think "too cold/too fast" rather than flow. Dull skin with random pockmarks? Moisture. Recurring artifacts at the same Z-height? Mechanical (play, Z-wobble) rather than material. If you compare paths in your gcode preview next to the result, you quickly see whether the material or the machine is “lying.” Nine times out of ten, returning to the reference profile helps: you hit reset, let Creality filament do what it does best, and only then take small steps forward.
Scalable operations: From one printer to small series
What works on one printer, you will want to do on three simultaneously tomorrow. Therefore, standardize not only your profiles but also the peripheral details: the same plates, the same cleaning routine, the same storage. Keep one set of spare nozzles and PTFE tubes per printer on hand and plan maintenance before it is needed. Thanks to the consistent diameter and material quality of Creality filament, you can copy settings between identical machines; only establish positional calibrations (e-steps, Z-offset) per machine. A simple log (date, batch, print duration, anomalies) makes your process audit-proof.
Safety and reliability in use
Functional parts need to be more than just pretty; they must perform predictably. Therefore, perform random spot checks on dimensions (calipers), strength (simple bending or tensile tests), and heat (brief loading at higher ambient temperatures). Where possible, incorporate radii instead of sharp corners in your CAD, orient layers with the line of force, and use wall multiples instead of endlessly increasing infill. This way, you maximize the qualities of Creality filament without falling into over-engineering.
Finally: Turn good luck into good management
Constant results are not a mystery, but a sum of small, repeatable steps. You store it dry, you start with a check on the first layer, you keep profiles tight, and you document what works. When something does change, revert to the reference profile and address the problem at its source. That is the way Creality filament proves its value: not through magic settings, but through a process you can execute every single day. Would you like to start with a solid foundation immediately? Contact AC PRODUCTS. We will set up your workflow together, so every print feels like a repeat of a success rather than a new experiment.


Leave a comment