


You are considering your first steps into 3D printing and are looking above all for clarity. A 3D printer for beginners should not burden you with endless fine-tuning, but rather help you get from sketch to result quickly. The promise sounds appealing: parts, molds, design studies, and replacement pieces that you make yourself. With the right choices regarding machine, material, software, and workspace, you can avoid common pitfalls. This way, a 3D printer for beginners becomes not just a hobby that gathers dust, but a practical tool that you use every week.
What exactly do you want to make and why is that important
Before you open a box, it pays to determine what you are going to print. Spare clips, enclosures, jigs, and prototypes place different demands on a printer than scale models or decorative objects. Functional parts require dimensional accuracy and repeatability. Cosmetic pieces benefit from nice layer lines and post-processing. Anyone who has this clear in advance will choose more effectively and get more return on their purchase. It also helps in setting up your workflow, because a 3D printer for beginners that suits your goal saves time and frustration.
FDM or resin: Two paths to the same goal
Most beginners choose FDM because it is versatile and clean. The filament is melted, laid down layer by layer, and provides usable parts without much post-treatment. Resin printers deliver extremely fine details, but require gloves, alcohol cleaning, and curing. For everyday usable parts, accessories, and enclosures, FDM is generally the best 3D printer for beginners. If you want miniatures with micro-details, then resin is worth considering, provided you have the space and discipline for the wet post-processing.
Workspace, ventilation, and safety
A printer works best on a stable table with sufficient ventilation and dust-free storage for filament. Keep the machine out of direct sunlight and ensure you have a grounded wall outlet. PLA has a mild scent, but PETG, ABS, or ASA require more ventilation. A compact cabinet or a ventilated area prevents drafts and makes your results more consistent. Also, remember that a 3D printer for beginners needs a moment to cool down after work. Do not touch the bed or nozzle immediately and keep children away while printing.
Materials: Start smart, then expand
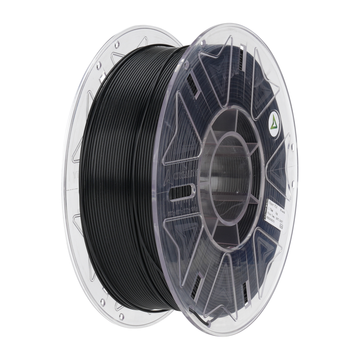
Start with PLA. It is forgiving, adheres easily, and lets you focus on design and settings. PETG is the logical next step for outdoor use or sturdy accessories: tougher, slightly more heat-resistant, and yet easy to print. For higher temperatures or UV resistance, ASA comes into play, but that requires an enclosure and a bit more experience. If choosing filament, pay attention to diameter consistency and drying. A dry box or resealable bag with desiccant is not a luxury. This way, you get more out of your 3D printer for beginners without struggling with stringing or brittle layers.
From CAD to print: The workflow in short
You design or download a model, open it in a slicer, and choose layer height, temperatures, and speeds. Layer height determines the trade-off between speed and detail; infill and wall thickness determine strength. For functional parts, wall thickness is often more important than high infill. Modern slicers offer profiles per material, which simplifies the entry process. Save every iteration with notes. A clear, repeatable workflow turns your 3D printer for beginners into a production tool rather than an experiment.
Checklist: Your first ten prints without frustration
The list below is intentionally the only list in this article and forms a compact startup plan.
- Choose one material and one nozzle size to learn with. PLA with 0.4 mm is ideal for the first few weeks.
- Start with 0.2 mm layer height and a moderate speed. Only go faster once the quality remains up to par.
- Clean and degrease the print bed, set the Z-offset with a thin piece of paper, and print a small first-layer test.
- Keep filament dry. If you see a lot of stringing, dry the spool for several hours in a filament dryer or a low-temperature oven.
- Print fitting parts in the same orientation as the final component so that shrinkage remains comparable.
- Use 3 perimeter walls for functional parts. That provides more strength than simply increasing the infill.
- Log every test: material, temperature, speed, and result. Repeat what works, adjust what bothers you.
With this foundation, a 3D printer for beginners will quickly grow with your ambitions.
Common mistakes and how to avoid them
Trying to do too much at once is the biggest pitfall. Anyone who immediately combines exotic filament, high speed, and thin layers will see variations in dimensions and adhesion. Therefore, limit your variables and work in iterations. Another blunder is underestimating drying. Many issues that seem like settings turn out to be moist filament. Finally: do not rely on infill for strength where it does not matter. For parts with screw holes or snap-fits, extra walls and local reinforcements in the model yield more than 80 percent infill.
Costs and time: Where is the real gain
Filament costs are straightforward. The real savings are in shorter lead times and less outsourced work. A print that provides your prototype in three hours saves days of waiting for a supplier. At the same time, it is fair to consider maintenance and consumption. Replace nozzles on time, keep guides clean, and schedule five minutes a week for inspection. That ensures your machine remains available whenever you need it.
Summary: Simplicity first, speed follows naturally
Those who choose clearly print better. Determine your goal, choose the right technique, keep the workspace tidy, and work with a repeatable workflow. Calibrate the first layer, change one variable per test, and document what you do. With this rhythm, your confidence grows and the quality rises along with it. In this way, a 3D printer for beginners becomes not just a practice project, but a solid piece of equipment that helps you learn faster, decide faster, and deliver faster.
Check out the extensive range and get inspired by AC PRODUCTS.


Leave a comment