


You want parts that not only "work," but also continue to perform in the real world: clips that stay flexible for weeks, housings that don't deform in the sun, and prototypes that look presentable. The key isn’t one magic printer setting, but the conscious choice of filament aligned with your design's purpose. In this guide, AC PRODUCTS outlines the practical approach: which properties really matter, how to translate them into a material selection, and which habits make the difference between accidental success and predictable quality.
Start with end-use, not the spool on the shelf
A useful rule of thumb: think in terms of forces, climate, and lifespan. What load will the part face (tension, bending, impact)? Under what temperatures or UV exposure must it function? And how often will it be loaded: once, daily, or continuously? By answering these three questions first, you will naturally see which combination of stiffness, toughness, heat resistance, and surface quality you need. Only then do you choose your filament; not the other way around. This prevents you from struggling with the slicer later to compensate for material properties that simply aren't there.
Aesthetics and presentation models: When it mainly needs to look “neat and professional”
For visual parts and display models, you gain a lot from easy processing and sleek surfaces. PLA and “silk” variants provide crystal-clear edges and sharp details at low temperatures. You don't need a heated chamber, layer adhesion is predictable, and post-processing (sanding, priming, painting) is quick. Such a profile is also easy to reproduce—handy if you are presenting multiple iterations. If the part requires slightly more temperature tolerance (e.g., in a warm shop window), PETG is a logical step: slightly tougher, better heat resistance, and still friendly in the workflow. With the right filament, you link design intent to print behavior—set it up correctly once and keep going.
Functional clips, clamps, and housings: A combination of stiffness and toughness
In practice, the sweet spot is often PETG or ASA. PETG gives you toughness and chemical resistance; ASA adds UV stability and remains dimensionally stable in the sun. If you choose ASA, work with a closed enclosure or controlled airflow to minimize warping. Avoid walls that are too thin in the direction of the layer lines; instead, use 3-4 perimeter layers for tension along the print. Don't be tempted to solve everything with 100% infill: more perimeters and smart raster orientation do more for strength than printing solid. A few test pieces will help you find the limits—linking the right filament to the geometry prevents surprises during assembly later.
Flexible applications: Grip, damping, and fatigue
For sleeves, dampers, seals, or non-slip applications, your part needs to flex back smoothly without tearing. TPU with a Shore hardness around 95A is often the safe middle ground for standard extruders; softer variants require lower speeds and adjusted retraction (or even no retraction) to prevent knots in the feed. Orient the layers in the direction of the stretch where possible, increase the contact area with the bed, and test modularly: the same shape in three infill densities tells you more than an afternoon of finetuning. With the right filament and a steady print pace, you quickly reach the zone where grip, damping, and longevity come into balance.
Design guidelines that translate material strength into reliability
Material choice is one side; geometry is the other. Use rounded corners instead of sharp internal radii to avoid stress concentrations. Align wall thickness to a multiple of your nozzle width—this results in solid, closed perimeters. For screw holes, an insert approach (thermal insert, lower RPM during assembly) works more reliably than self-tapping screws into print lines. For snap-fits, a “living hinge”-like shape, with slightly more length and a rounded root, helps prevent breakage. These choices ensure a suitable filament performs as expected in the final product.
Workflow that pays off: Profiles, dryness, and documentation
Consistency comes from routine. Create one proven recipe per material covering layer height, cooling, base speed, and retraction. Work with structured tables (spool number, batch, bed/nozzle temperature, chamber temperature) and briefly note any deviations. Dry hygroscopic materials (PA, PETG) in a dryer or warm cabinet and store them in a box with desiccant; damp filament translates to a matte finish, poor bridging, and unpredictable dimensions. By maintaining small habits, "tweaking" turns into "producing."
Testing without wasting time
Rapid learning beats endless tuning. Print a set of small coupons: tension bar (strength), L-profile (warping), bridge test (cooling), tolerance block (fit). An hour of printing, fifteen minutes of evaluating, and you know 80% of what you need to know. Document the "winners" in your library and compare them against the CAD goal. This creates a short and reproducible path from idea to part—exactly what you want when you purposefully connect material and design with filament.
A compact checklist for material selection
- End-use clear? Loads, climate, lifespan.
- Core property chosen? Stiff, tough, heat, chemical, UV.
- Geometry aligned? Wall multiples, radii, inserts where necessary.
- Process secured? Chamber, profiles, dryness, logging.
- Supply arranged? Batch continuity and lead time.
- Sustainability considered? Recycle options, spool policy.
If you tick off this list, the step from choice to result is surprisingly short.
AC PRODUCTS: From spool to result
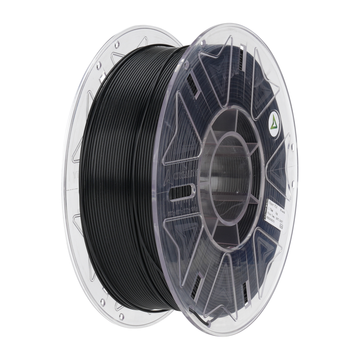
We encounter the same question every day: “Which spool should I use for this purpose?” Our answer is rarely one brand or one type; it is a small plan. We look at your part, the assembly, the environment, and the lead time. We then provide not only material, but also starting profiles, a brief test set, and practical tips for storage and post-processing. This ensures filament doesn't become a variable you have to tame every time, but a predictable link in your design and production process.
Conclusion: Material choice is design choice
A strong print starts before the slicer. By first outlining the end-use and only then choosing the material, you take the noise out of the process. With the right filament, a few well-thought-out design guidelines, and a simple but consistent workflow, you print parts that do what you promise—today, next week, and three months from now. Want to brainstorm about the best choice for your next project? AC PRODUCTS thinks along, provides honest calculations, and helps you test quickly. This way, material selection isn't a gamble, but an advantage you feel with every delivery.


Leave a comment