


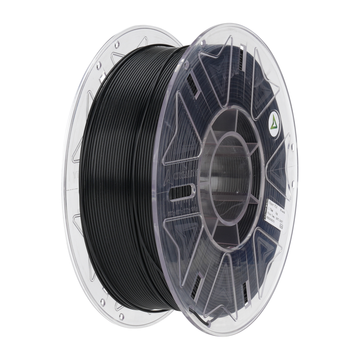
You want functional, flexible parts that not only look good but also continue to perform after thousands of bends. TPU 3D filament makes that possible, provided you treat speed and settings as a duo. Speed is tempting, but control is crucial. In this guide from AC PRODUCTS, you will get a pragmatic step-by-step plan: which hardware factors matter most, which slicer settings work, and how to increase print speed responsibly without compromising grip, damping, or dimensional accuracy.
Why TPU behaves differently than “hard” plastics
Elastomers want to bend, even in the extrusion path. This means: more friction in the filament path, potential oozing during retractions, and a stronger relationship between cooling and layer adhesion. TPU 3D filament behaves like a spring in your drive; any overly aggressive acceleration or retraction translates into variations in flow. You get the best results if you let the printer work “calmly and strongly”: low peaks in speed, predictable accelerations, and minimal stress in the filament path.
Hardware that makes the difference
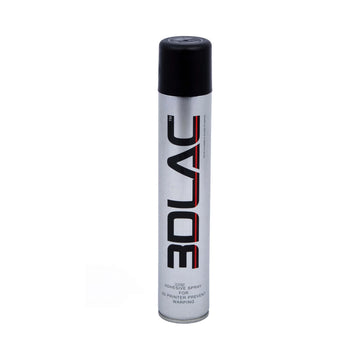
Direct-drive extruders have an advantage: a short filament path, better grip, and less compression. Bowden is possible, but requires lower speeds and modest retractions. Note: a smooth, as straight as possible path without sharp turns prevents TPU 3D filament from kinking. A hardened nozzle is not necessarily required (unless using filled variants), but a reliable 0.4–0.6 mm aperture makes the flow more stable. The bed? PEI or a fine texture provides good adhesion; if necessary, use a thin layer of adhesive as a “release” agent for very sticky variants so that parts detach neatly after cooling.
Quick start settings for consistent results (at a glance)
- Temperature & bed: start around 215-235 °C for the nozzle and 30-50 °C for the bed. Higher for fast layer adhesion, lower for finer details; note the sweet spot for each roll.
- Speeds: 20-35 mm/s perimeters, 25-40 mm/s infill, 15-22 mm/s for the first layer. Keep closer to the lower end for Bowden setups.
- Retraction & coasting: direct-drive 0.5–1.5 mm retraction at 10-25 mm/s; Bowden sparingly and slower. Minimize retractions via combing/avoid crossing perimeters.
- Cooling: moderate and directed. 30-50% after the first layers; too much cooling weakens layer adhesion.
- Acceleration/vibrations: reduce accelerations and jerk. Input/pressure advance: use subtly; aggression harms consistency.
- Walls & infill: 3-4 perimeters, 15-35% infill depending on damping/toughness; gyroid or cubic works evenly.
- Adhesion: brim of 3-6 lines for small footprints; first layer slightly wider (105-110% extrusion width) for neat closing.
Design for flexibility: Print with function in mind
The orientation of layer lines is your greatest strength. If you want to bend in one direction, place the walls perpendicular to the bending direction. For grip parts, a thicker outer shell (more perimeters) with lower infill often works better than the reverse: the wall supports, the core damps. For dampers and shock absorbers, it is better to choose an even infill with open cells (gyroid) so that TPU 3D filament can absorb and release energy without hard hotspots.
About stringing, gloss, and edges
Stringing with elastomers is notorious, but usually solvable. Lower the temperature step-by-step (2-3 °C per step), limit retractions, and have the slicer move within the contours. A slightly higher travel speed helps to stretch threads into nothingness. Do you see micro-bubbles or a rough, matte appearance? Then moisture is the culprit. And if edges “overfill”: lower the flow by 2-3%, do not make the first-layer-height too thin, and check that the bed is level (mesh-leveling on).
Increasing print speed without surprises
Speed is a pitfall if you change all parameters at once. Choose one learning path per iteration: first increase infill, then perimeters. Always keep the first layer conservative; you gain nothing from speed there. Monitor corners: with TPU 3D filament, sharp corners reveal overshoot and excessive acceleration. Do you see rounded corners or “ears”? Lower acceleration/jerk, not necessarily the speed. A small extra waiting time per layer (minimum layer time) prevents narrow towers from remaining too soft.
Dry and constant: The quiet win
Moisture is the silent disturber. Damp material causes stringing, inconsistent extrusion, and a granular surface. Store TPU 3D filament in a sealed box with desiccant and a simple hygrometer; aim for under ~20% RH in the box. After long periods of exposure, dry the roll at a low temperature according to the material guidelines. You will see the difference immediately: cleaner contours, tighter bridges, and a noticeably more even flow. Consistency begins in storage.
AC PRODUCTS: Profiles, materials, and pragmatic advice
You don't want experiments; you want results. That is why we provide matching profiles for popular printers (direct- and Bowden-drive), plus advice on nozzle selection, drying solutions, and infill strategies for grip and damping. Do you work with multiple rolls or Shore hardnesses? We help you set up simple color and hardness management so you never have to guess which settings belong to which roll. This way, working with TPU 3D filament is not a gamble, but a manageable step in your development and production process.
Conclusion: Faster is okay, smarter is mandatory
With elastic material, you gain little by blindly printing faster; you gain much by becoming more stable. If you tame the flow, use cooling consciously, and keep accelerations in check, you can increase print speed surprisingly high without losing the qualities for which you chose TPU 3D filament. Start small, measure what works, and only scale up after two flawless runs. AC PRODUCTS is ready with profiles, materials, and practical tips so you can see the difference today: clean edges, predictable dimensions, and parts that do exactly what you intended on the screen when held in your hand.


Leave a comment