


You don’t want guesswork; you want predictable parts that fit, snap together, and look sharp. That doesn’t start with magic slicer tricks, but with a series of small habits that make a big difference together. With the right workflow, your 3D printer makes fewer errors, you waste less material, and you save time for design and delivery. In this guide, AC PRODUCTS outlines the practical steps—sober, repeatable, and directly applicable to your workspace.
Material selection and drying: Constant foundation, constant result
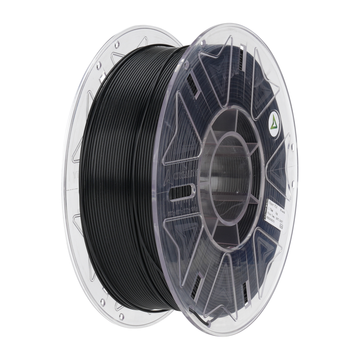
PLA for quick visual parts, PETG for tough clips, ASA for outdoor use, and TPU for grip or damping. If you choose one proven recipe for each part type, you eliminate 80% of the variation. Meanwhile, moisture is the great spoiler: stringing, matte skin, and porous lines rarely come from the slicer; they usually come from wet filament. Store spools airtight with desiccant, note the opening date, and always re-dry before starting a longer series. This discipline allows your 3D printer to deliver the same quality day in, day out.
The first layer is the first quality control
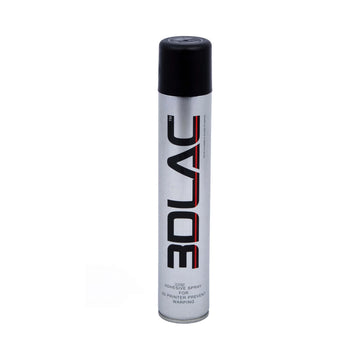
No perfect print without a perfect start. Make it a ritual: nozzle clean, build plate degreased, Z-offset checked with a short brim or skirt. If it sticks too well (especially with PETG on PEI), use an intermediate layer like a glue stick to facilitate removal. A smooth first layer tells you within 30 seconds if today’s print is going to work; intervening at this moment saves hours.
Profiles that you leave alone
Create three profiles per material: detail, all-round, and fast/strong. Fix layer height, wall multiples, cooling, retract, acceleration, and jerk. Change only the temperature (in small increments) or speed when the geometry demands it. The less you tinker, the more predictable the outcome. A 3D printer likes boredom: fixed profiles deliver fixed results.
Orientation, perimeters, and infill: Strength from the slicer
Layer lines are laminations; orientation determines your fracture plane. Align critical forces with the plane of the perimeters and round off sharp internal corners to prevent stress concentrations. Prefer extra perimeters over absurdly high infill; walls do the real work, infill provides support. For snap-fit or hinge points, a larger nozzle (0.6-0.8 mm) is often stronger and faster: fewer seams, thicker tracks, and better inter-layer bonding. This way, your 3D printer produces functional parts with less risk.
Cooling and temperature: Small steps, big effect
Many problems disappear with a 5-10 °C temperature difference or a subtle adjustment to the cooling. PLA likes plenty of air, PETG likes cooling for dimensional accuracy, and ABS/ASA likes controlled heat. Pay close attention to bridges, overhangs, and layer adhesion: gloss without adhesion is too cold, while sagging corners and elephant foot are too hot or too fast. By working consistently in small steps, your 3D printer remains predictable and you avoid a domino effect of compensations.
A compact checklist for every print (keep it next to the machine)
- Purpose & material selected (visual vs. functional) + correct nozzle.
- Filament dry (box/hygrometer) and spool labeled with batch/date.
- Build plate degreased + reference brim checked (gloss/width/consistency).
- Profile fixed (detail/all-round/fast-strong); only fine-tune temperature.
- Orientation & perimeters aligned with stress lines; sharp corners rounded.
- Acceptance piece (golden sample) in sight for quick visual match.
This list seems simple, and that is exactly the point. Simplicity is reproducible.
Planning post-processing intelligently
A clean surface does not just happen inside the printer. Sand purposefully (not everything), flame briefly to remove hairs, and choose a fixed primer/finishing routine per material for visual parts. Document the grit, primer, and drying time; this is how you get the same look batch after batch. Those who plan post-processing instead of improvising get more out of the same 3D printer without it feeling like extra work.
From one machine to small series
Standardize not just your profiles, but also your preconditions: the same plates, identical nozzles, uniform storage. Keep a short status card for each machine (Z-offset, last nozzle change, belt check). Register material batches and link them to parts. If three printers are configured identically, you can distribute jobs without re-calibrating—a 3D printer then becomes a link in a tidy chain, not an island.
Time is your real cost factor
You might not see it on the invoice, but you do in the planning: every hour you don’t have to spend fixing things is pure profit. Fewer failed prints, less post-processing, fewer operator interventions—that is where you earn it back. Your 3D printer doesn’t pay for itself with spec-sheet speed, but with predictable cycles and a declining failure rate. That is why teams that document and standardize always beat teams that slice by “feel.”
Finally: Make success a habit
Better printing isn’t a trick; it’s a series of small choices that you repeat consistently. You start with the goal, choose the appropriate material, keep the filament dry, monitor the first layer, leave profiles alone, and solve problems at the source. If you do that, every new job feels less like a risk and more like a routine. And that is exactly where you want to be. Would you like to get started with a solid foundation right away? Get in touch with AC PRODUCTS. We will help you set up a workflow in which your 3D printer delivers what you promise—today, tomorrow, and next week.


Leave a comment